Who is Sugar Love?

I'm a Wife and Mommy in New Hampshire and have always had a passion for food, baking, and entertaining. I'll post some of my recipes here along with pictures of some of the things I've done for parties and events.

I try to live healthy, but love food...not always a good combination. I try to make recipes for some of my favorite things healthier anywhere I can. Some recipes are just meant to be delicious, but I make most of my recipes with less fat if it doesn't compromise too much flavor.

Wednesday, October 2, 2013

SugarLove's (Award Winning) Chili

Fall is here! That means cooler days, pretty leaves, football, and chili! Our town recently did a "Town Day" with a chili cook off and apple pie bake off.  I have to admit that I was the only entrant for the apple pie contest, so I won 1st place.  I hope that they at least liked the pie...
The chili contest had 3 other entrants that I was up against, but still took first place! I didn't take a picture of the chili for a couple of reasons.  First, chili isn't super pretty.  Second, I forgot. I'll take a picture the next time, but for now, here's a picture of my award from the contest followed by the recipe.
Enjoy!

Seasoning blend (makes several batches of chili):
4 Tbl Chili Powder 
2 Tbl Flour 
2 Tbl Cumin
1 Tbl Garlic Powder 
1 Tbl Onion Powder 
1/2 Tbl Sugar 
2 tsp Paprika 
1 tsp Black Pepper
1 tsp Salt 
1 tsp Red Pepper Flakes
1 tsp Cayenne Pepper 
1 tsp Oregano 
1 tsp Parsley 

~ Mix all together and store in an air tight container – Use ¼ cup per batch of chili ~

Chili:

1 lb of sirloin, cut into small cubes and browned
1 – 1 ½ lbs Ground Turkey, browned
½ medium onion
1 large can Tomato Sauce
1 can Diced Tomatoes, drained
As many hot peppers as you like
1 Bell Pepper, diced (color of your choice)
¼ cup seasoning blend
2 cans of your favorite beans (or extra veggies or meat if you don’t like beans)

Mix all ingredients together in a crock pot.  Cook on low 8-10 or high 4-6 hours.   

Thursday, September 19, 2013

(Healthy) Pumpkin Bars with Cream Cheese Frosting

The season of "everything pumpkin!" is here! I love this time of year.  I live in New England, so the fall is beautiful here and there are so many fall festivities going on.  With the chill in the air, I love baking as well.  I love just about anything with pumpkin.  Pumpkin itself is a healthy ingredient full of vitamins and fiber, but a lot of fall recipes include butter, sugar....all kinds of delicousness that makes me fat by Thanksgiving.
This recipe tastes like a combination of pumpkin pie and blondies.  They aren't super sweet, but the cream cheese frosting makes up for that.  
This recipe uses soy flour.  I like soy flour because it's low in carbs, high in protein, and not as expensive as other specialty flours. You could try using regular flour or wheat flour. I haven't tried that yet.


For the bars:
2 large Eggs
1 cup Pumpkin Puree (canned or fresh)
1/2 cup Honey

1/4 cup Coconut Oil, warmed
1/4 cup Unsweetened Apple Sauce 
1 tsp. Vanilla extract
1 1/4 cup Soy Flour
1 1/2 tsp. Pumpkin Pie Spice

1/2 tsp. Salt
1 tsp. Baking Powder
**If you like things on the sweeter side, add 1 packet of Natural Stevia Sweetener to the batter.

1. Preheat the oven to 350F. Combine the eggs, pumpkin puree, honey, coconut oil, apple sauce and vanilla extract in a medium sized mixing bowl and either beat with an electric mixer on low or by hand until well combined.
2. In a separate bowl, combine the flour, pumpkin pie spice, salt and baking powder. Slowly add the flour mixture to the pumpkin mixture, and mix just until well combined.


**If you like things on the sweeter side, add 1 packet of Stevia sweetener to the batter and mix well.
3. Pour the mixture into an 8x8 baking pan (coated with Cooking Spray) and Bake for 20-25 minutes or until the center it set. Remove and allow to cool completely before serving. 


For the Cream Cheese Frosting: 

1 Package (8oz) Reduced Fat Cream Cheese
8 Tbsp (1/2 cup) Light Butter or Reduced Fat Margarine
2 Tbsp Milk
1 tsp Vanilla Extract
16 oz Powdered Sugar
 
Combine cream cheese, butter, milk, and vanilla with an electric mixer (or by hand if you’ve got the energy).  Slowly add powdered sugar on low speed so you don’t make a mess. If the frosting is too thin, add a little more powdered sugar. If it’s too stiff, add a little more milk.  You can adjust these until you have the desired consistency.

Put it all together: 
 
Once the bars have cooled, frost however you like. Cream cheese frosting is a little more thin than buttercream, so it doesn’t mold well.  I put some frosting in a plastic lunch bag and cut the corner off.  I made line design on top of my bars.

Enjoy!

Monday, September 16, 2013

Healthier (and YUMMY!) Red Velvet Cake


I love cake.  It is definitely my favorite food, always has been.  Cake is one of those things that I can't live without, but I try to eat healthy as much as I can.  This cake is absolutely delicious and SO much less fat than the original.   The cake leaves out Eggs, Oil and Water and only uses 1 cup of Diet Dr. Pepper. Seriously! I'm sure you could use Root Beer or Coke or whatever you want, but the diet makes it so the only calories are the cake mix.  The frosting is delicious too, has all the flavor of regular cream cheese frosting, but a fraction of the fat.  Now you can have your cake and ENJOY it too!


For the cake:

1 Box Red Velvet Cake Mix
8 oz (1 Cup) Diet Dr. Pepper
 
Stir cake mix and Dr. Pepper until combined. Don’t over mix.  Spray pan of choice with cooking spray ( lined muffin pans (2/3 full), 1 13x9 Pan, or 2 Round Cake pans). I made this in the 2 cake round pans.
Bake at 350 ~15 minutes, or until a toothpick inserted in the middle comes out clean.
Put cakes on cooling rack and allow to cool completely.

For the Cream Cheese Frosting: 

1 Package (8oz) Reduced Fat Cream Cheese
8 Tbsp (1/2 cup) Light Butter or Reduced Fat Margarine
2 Tbsp Milk
1 tsp Vanilla Extract
16 oz Powdered Sugar
 
Combine cream cheese, butter, milk, and vanilla with an electric mixer (or by hand if you’ve got the energy).  Slowly add powdered sugar on low speed so you don’t make a mess. If the frosting is too thin, add a little more powdered sugar. If it’s too stiff, add a little more milk.  You can adjust these until you have the desired consistency.

Put it all together: 
 
Once cake has cooled, frost however you like. Cream cheese frosting is a little more thin than buttercream, so it doesn’t mold well.  I put a layer of frosting in between my two round cakes, then added a layer of frosting to the top of the cake. I thought it looked pretty, but you can do the sides if you want to as well.

Enjoy!

Friday, August 30, 2013

Baby's First Flight

Our family goes on vacation every year.  This year, we're going to Palm Beach - Sun, Swimming, Relaxing, perfect! But wait...we have a very BUSY 7 1/2 month old baby girl! Savannah is a wonderful baby and so smart, but we have no idea how she'll react to being held in one place on an airplane for 3 hours. 

I made these little gifts for the airline passengers sitting around us to ease the anxiety (my own) of flying with a baby.  I worry too much about what people think, so this way, there's no way they can stay mad if I make them smile and apologize with snacks before there's an incident!

This was so simple- I printed a cute little poem and airplane picture on some round labels. I stuck them on clear treat bags and put a pair of earplugs inside.  

If you can't read the poem in the picture, it says:

"My name is Savannah,
this is my first flight.
Here are some treats in case 
my smile doesn't 
stay as bright."

Next, get some ribbon and tie a bow around your snack of choice (I went with animal crackers to stay with the kid theme) and the earplug bag so that they stay together. 

Ta Da! Treat bags!  Happy Travels!
 

Friday, July 26, 2013

Coming Soon...

Strawberry Buttercream Frosting with HALF the fat!
Yes, seriously. I wouldn't joke about frosting and half the fat! Cake is my absolute favorite food and I'll be honest, this is mostly because of the frosting part.  I made a delicious strawberry buttercream with real pureed strawberries, Light Butter, and it took literally 5 minutes.

I'll get the complete recipe up this weekend, but here's a sneak peak of how it turned out!


Tuesday, July 23, 2013

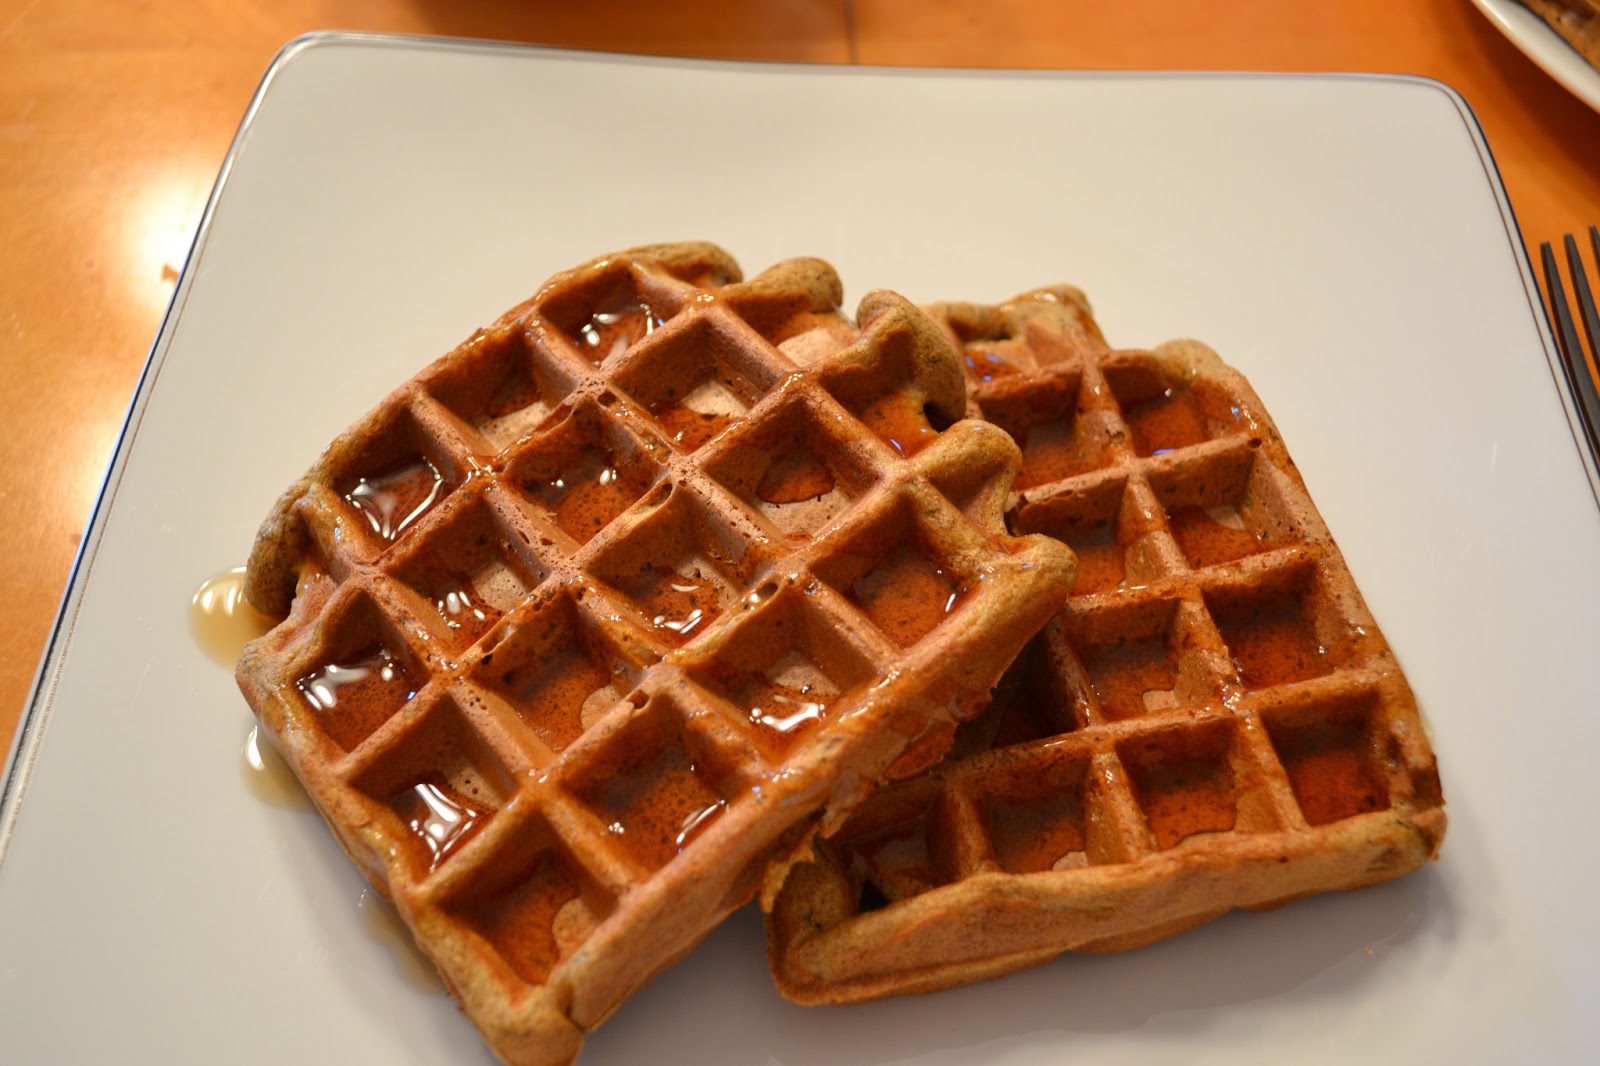
Healthier Bananas Foster Waffles

I love breakfast, but a lot of yummy breakfast foods are not exactly good for you.  They slow you down instead of revving you up for your day.  I like to make breakfast on the weekends for my husband and myself, so here's a healthier breakfast with all the flavor of a naughty one. :) Enjoy!

Ingredients:
2 Large Eggs
1 3/4 Cups Milk (I use Soy or Almond)
2 Tbsp Dark Rum
2 Large Very Ripe Bananas
1 Cup All Purpose Flour
1 Cup Wheat Flour (You could use all white flour or all wheat flour if you prefer)
1 Tbsp Brown Sugar
1 tsp Cinnamon
3 1/2 tsp Baking Powder
1/4 tsp Salt

Directions:
1. Heat your waffle iron to a medium setting

 2. Mix your wet ingredients in a bowl and mash the bananas in
3. Mix your dry ingredients into the bowl
4. Spray waffle iron with cooking spray and pour batter into the waffle iron per your iron's instructions. Mine instructs to put 1/3 cup batter into each section, but every machine is different


5. Let them cook 3-4 minutes or until a nice golden brown


6. You can serve these a number of ways.  I like to serve with walnuts and maple syrup, and you can add fruit as well.
Enjoy!